What to Expect from Your First Ski Lesson: A Step-by-Step Breakdown
If you're thinking of trying skiing for the first time, congratulations! Skiing is an exciting winter sport that combines the thrill of gliding down snow-covered mountains with breathtaking views and a good dose of physical activity. But before you race to the slopes, it's crucial to understand that skiing has a learning curve, and taking lessons is the best way to begin. For first-time skiers, ski lessons are an opportunity to build confidence, learn the basics, and enjoy a safe and fun experience. In this guide, we’ll walk you through what to expect from your first ski lesson, step by step.
1. Arriving at the Ski Resort
Your first ski lesson starts long before you clip into your skis. When you arrive at the ski resort, it’s important to give yourself enough time to settle in, get your rental gear, and meet your instructor. Most resorts recommend arriving at least an hour before your scheduled lesson to ensure you have time to prepare. Depending on the resort, you may need to visit the rental shop for ski boots, skis, poles, and a helmet if you don’t own your own equipment. 스키레슨
Make sure you dress appropriately for the cold weather. Skiing involves exposure to snow, wind, and sometimes moisture, so dressing in layers is key. Start with a moisture-wicking base layer to keep sweat off your skin, add an insulating middle layer for warmth, and top it off with a waterproof jacket and pants to keep dry. Don’t forget your gloves, ski socks, and goggles or sunglasses to protect your eyes from the sun and wind.
2. Meeting Your Instructor and Group
Once you have your gear, you'll head to the designated meeting area for your ski lesson. If you've booked a private lesson, you'll meet your instructor one-on-one. In a group lesson, you’ll be learning alongside other beginners. Group lessons can be a fun way to share the experience with fellow first-timers, while private lessons offer more personalized attention and instruction.
Your instructor will introduce themselves and give a brief overview of the lesson plan. They’ll also likely ask about your previous skiing or snowboarding experience (if any) to get a sense of your comfort level on the slopes.
3. Getting Familiar with Your Gear
Before you hit the slopes, you’ll spend some time getting comfortable with your ski equipment. For first-time skiers, the ski boots may feel stiff and awkward at first. Ski boots are designed to provide support and control while skiing, so they need to fit snugly. Your instructor will show you how to properly buckle your boots to ensure they’re secure but not too tight.
Next, you’ll learn how to attach your skis to your boots using the bindings. This process may seem tricky at first, but it’s a simple step that you’ll soon master. Your instructor will also teach you how to use your poles, which are primarily for balance and support, not for propulsion.
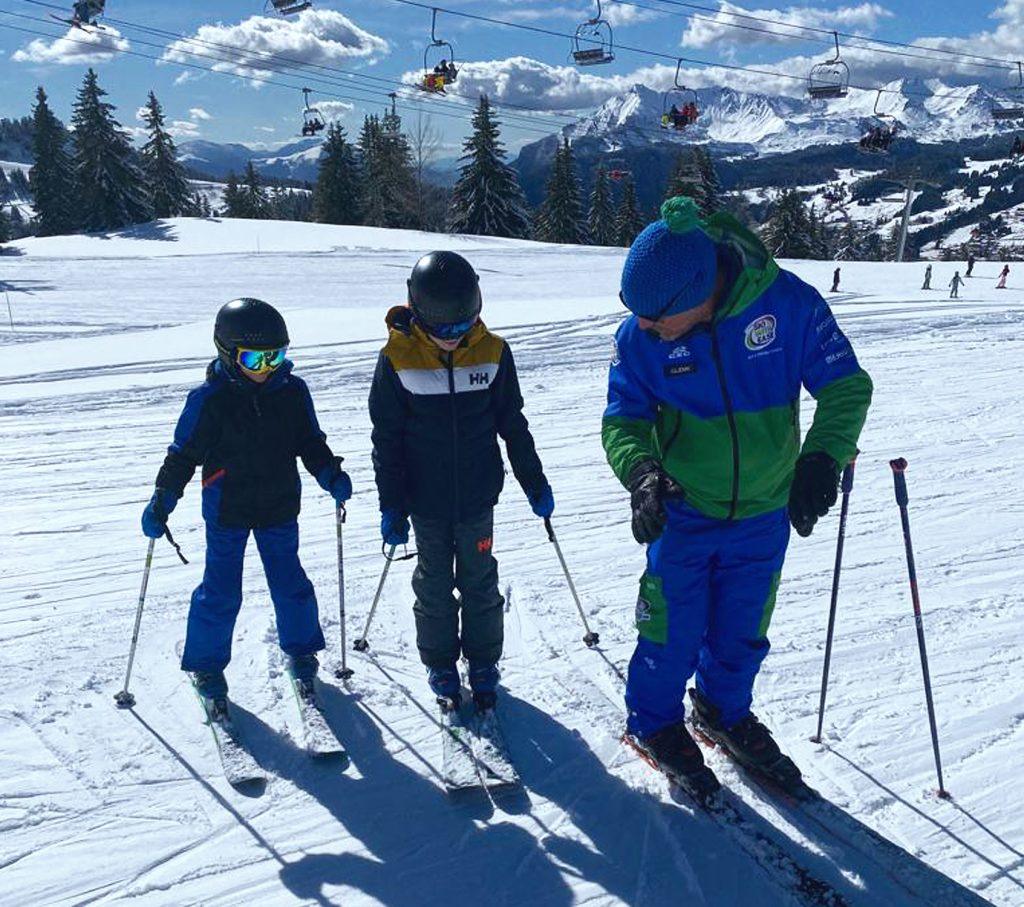
4. Learning the Basics: Stance and Movement
With your gear on, you’ll start with basic movements on flat terrain. Your instructor will teach you how to stand properly on your skis, with a slight bend in your knees, your weight evenly distributed, and your body relaxed. Good posture and balance are key to maintaining control while skiing.
Next, you’ll practice sliding forward on your skis without picking up too much speed. This will help you get used to the sensation of gliding on snow. You may also practice “walking” in your skis by shuffling your feet, which is a useful technique for moving short distances on flat or gentle inclines.
5. The Snowplow: Your First Technique
The snowplow, also known as the “pizza” technique, is the first skiing technique most beginners learn. This technique involves positioning your skis in a V-shape with the tips pointed toward each other and the tails spread apart. The snowplow is an essential skill for controlling your speed and stopping, making it ideal for beginners who are still gaining confidence on the slopes.
Your instructor will guide you through practicing the snowplow on a gentle slope. At first, you’ll practice the motion on flat ground, and then gradually move to a small incline. The idea is to get comfortable with the motion of pushing the edges of your skis into the snow to create friction, which will slow you down and eventually stop you. Don’t worry if it feels awkward at first—your instructor will give you plenty of time to practice until you feel confident.
6. Turning with the Snowplow
Once you’ve mastered the basics of stopping and controlling your speed with the snowplow, your instructor will teach you how to turn. Turning is a critical skill for navigating the slopes and avoiding obstacles.
Using the snowplow technique, your instructor will show you how to initiate a turn by shifting your weight to one ski while keeping the other ski in the snowplow position. You’ll practice gentle turns on flat terrain or a small incline, gradually working up to more dynamic turns as your confidence grows.
7. Riding the Magic Carpet or Beginner Lift
After practicing the basics on flat ground and small inclines, it’s time to take your first ride on the beginner lift. Many resorts have beginner-friendly lifts, such as a magic carpet (a conveyor belt-style lift) or a slow-moving chairlift. Your instructor will teach you how to safely get on and off the lift, a skill that can feel intimidating at first but quickly becomes second nature.
The beginner lift will take you to the top of a gentle slope, often referred to as the “bunny hill.” This is where you’ll put all the skills you’ve learned into practice.
8. Your First Descent
Now comes the exciting part—your first descent down the bunny hill. Under the watchful eye of your instructor, you’ll glide down the slope using the snowplow to control your speed and turn as needed. The goal here is to combine all the techniques you’ve learned—proper stance, balance, speed control, and turning—into a smooth, controlled run.
It’s normal to feel nervous or a bit wobbly on your first few runs, but remember, everyone starts somewhere! Your instructor will offer feedback and encouragement to help you improve with each descent.
9. Practicing and Repeating
The rest of your lesson will focus on practice and repetition. You’ll ride the beginner lift multiple times, practicing your descents on the bunny hill and gradually improving your skills. Your instructor will offer tips and guidance to help you refine your technique and build confidence. Each run down the hill will feel a little smoother as you get more comfortable on your skis.
10. Ending the Lesson and Next Steps
At the end of your first ski lesson, your instructor will likely review what you’ve learned and offer some tips for continued practice. They may also recommend additional lessons if you’re interested in progressing to more advanced slopes or refining your skills further. 스키강습
Remember that skiing, like any new skill, takes time to master. Don’t get discouraged if you don’t feel like an expert after your first lesson—it’s all part of the learning process. With practice and patience, you’ll soon feel more confident on the slopes and ready to tackle more challenging terrain.
Final Thoughts
Your first ski lesson is an exciting introduction to the world of skiing. It provides you with the essential skills, knowledge, and confidence to enjoy the slopes safely and effectively. By learning proper techniques from a qualified instructor, you’ll set yourself up for success and have a more enjoyable experience overall. So, grab your gear, head to the mountains, and get ready for an unforgettable adventure on the snow!